For users of RF radio frequency lasers, a drop in laser power often becomes a frustrating “chronic issue.” It is less obvious than a complete equipment failure. However, it gradually reduces production efficiency and impacts processing quality. As an experienced operator, you need a systematic diagnostic approach. This process examines the laser from external optics to internal electronics and cooling fluid dynamics. Ultimately, it provides a full “health check.”
I. Deep Dive: Eight Core Reasons for RF Laser Power Decline
- Contamination and Damage to External Optical Lenses
This is the most common and easily resolved problem. Smoke, grease, or metal splatters on the laser tube’s output window, reflective mirrors, or focusing lens directly absorb laser power. This absorption not only reduces laser power output. Moreover, localized heating creates a “thermal lensing effect.” This, in turn, causes the laser focus to drift, affecting processing accuracy. - Optical Path Misalignment and Deviation
Mechanical vibrations, temperature fluctuations, or loose fasteners can shift the laser’s optical path. As the laser beam travels through multiple mirrors, it may not remain centered. Indeed, it could even become partially obstructed. Consequently, even if the laser tube’s intrinsic laser power output is normal, the laser power reaching the material surface will significantly decrease. - Inefficient Cooling System
RF lasers typically convert only 10% to 20% of electrical energy into laser power. Most input energy transforms into heat. If the chiller’s temperature control accuracy drops, or if cooling water flow is insufficient, or if the condenser collects excessive dust, the laser cavity’s internal temperature rises. Elevated temperatures directly impair laser gas molecule energy transitions. This, in turn, reduces laser generation efficiency and output laser power. - Environmental Humidity and Condensation
This presents an often-overlooked yet significant risk. When you set cooling water temperature too low, and environmental humidity is high, tiny condensation forms. This occurs on the laser tube’s optical output window or mirror surfaces. This barely visible water film severely scatters and absorbs laser power. Thus, it causes a noticeable drop in laser power. - RF Radio Frequency Power Supply (Driver) Aging
The RF power supply acts as the core energy source for proper laser tube operation. Over time, internal components like power amplifier modules, capacitors, or matching circuits may degrade. If the RF power supply’s output laser power becomes insufficient, the discharge intensity inside the laser tube weakens. This directly reduces the overall laser power output. - Control Signal Interference and Duty Cycle Loss
The controller generates a PWM (Pulse Width Modulation) signal, which controls laser power. If electromagnetic interference affects this signal during transmission, or if cable aging distorts its waveform, the laser receives a lower actual duty cycle than the software setting. This manifests as a “soft” laser power decline. The system appears normal, but actual output is insufficient. - Resonator Internal Gas Aging or Leakage
RF lasers feature a fully sealed design. Nevertheless, after several years (typically 5-7+ years) of continuous use, minute gas permeation or slow outgassing from internal materials can alter the CO2 gas purity and ratio within the laser cavity. When this gas balance shifts, the laser’s output laser power will exhibit an irreversible, gradual decay. - Internal Cavity Mirror Damage or Coating Degradation
The laser tube’s internal total reflector and output coupler mirrors are sealed. However, they constantly endure high-intensity laser photon bombardment and RF field exposure. Their surface coatings may gradually age or suffer minor thermal damage. This diminishes the resonator’s quality factor (Q-value). Consequently, it affects stable laser power output and overall laser power.
II. Standardized Troubleshooting Process: An “Outside-In” Approach
When you observe slower laser processing speeds or incomplete material cutting, then follow this “Standardized Troubleshooting Process” for a systematic diagnosis:
Step One: Optical Cleaning and Initial Verification
First, thoroughly clean all external optical lenses (e.g., protective window, reflective mirrors, focusing lens). Next, perform a “dot test” at the laser tube’s front end (output aperture). Use a laser power meter to measure its direct output. If the measured laser power is normal at this point, then the issue likely stems from subsequent reflective mirrors or optical path alignment.
Step Two: Cooling System Health Check
Carefully monitor the chiller’s real-time temperature display. Ensure its temperature remains stable at the set target (typically 20-25°C) without significant fluctuations. Furthermore, check the circulation pump’s pressure and flow meter. Confirm no bends, leaks, or impurity blockages exist within the cooling water lines.
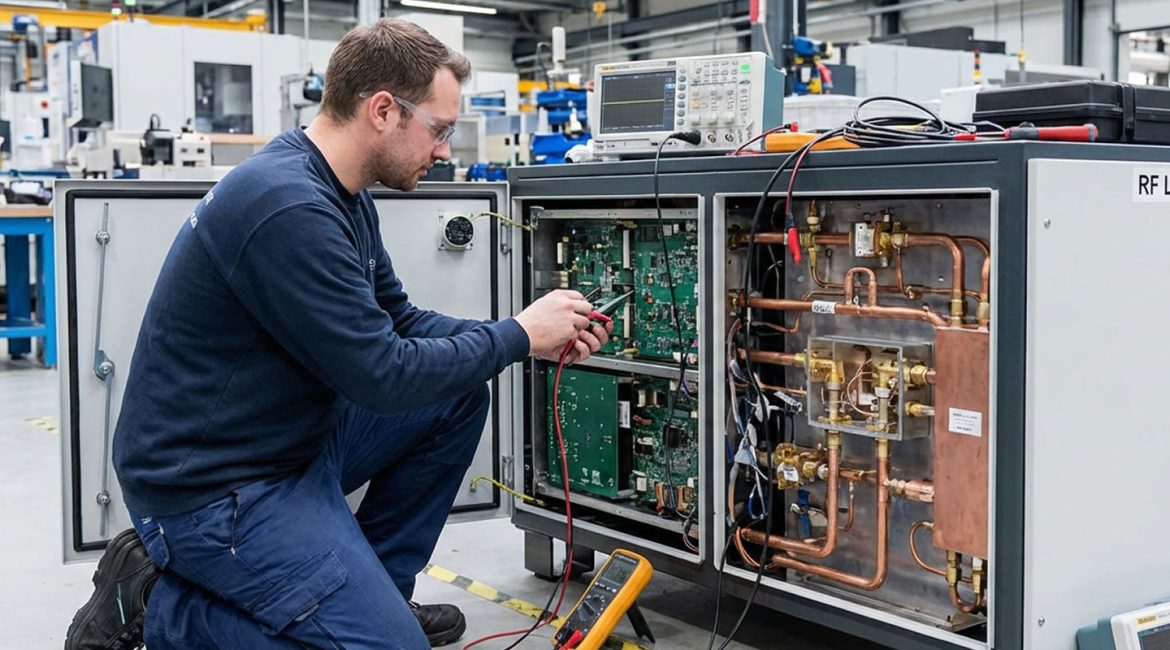
Step Three: RF Power Supply and Signal Diagnosis
While ensuring operational safety, first verify the RF radio frequency power supply’s input voltage and operating current. Then, use an oscilloscope to examine the PWM (Pulse Width Modulation) signal waveform. This signal travels from the controller to the RF power supply. Confirm its frequency and duty cycle precisely match software settings. This action helps exclude interference or distortion issues in the control signal transmission, which can directly impact laser power.
Step Four: Optical Path Alignment and Focus Re-verification
Use alignment paper (or a specialized beam analyzer) to meticulously check if the laser beam consistently passes through each reflective mirror’s center. Also, confirm it focuses accurately at the focusing head’s center. Simultaneously, recalibrate the processing platform’s focal length. This eliminates “pseudo laser power decline” caused by mechanical settling or improper adjustments.
Step Five: Internal Factor Determination
If you have ruled out and adjusted all external factors, and the laser’s output laser power still falls significantly below 80% of its nominal value, then you can generally conclude the problem lies within the laser tube. This likely indicates gas aging or internal cavity mirror damage. In this situation, immediately contact the original manufacturer or a professional service provider for factory refilling or repair.