In laser processing, the focusing lens plays a crucial role. It concentrates kilowatts of laser energy into a micron-sized spot. However, the ZnSe material is notably soft. Furthermore, it easily attracts smoke and dust. Even tiny dust particles can quickly carbonize under high laser temperatures. This forms a “burn spot,” consequently causing thermal cracking. Such damage severely impacts processing quality and equipment lifespan.
Therefore, professional laser lens cleaning and maintenance go beyond simple wiping. It is a precise care process for the microscopic world. Follow these 10 essential steps. They will ensure your focusing lens remains in optimal working condition.
I. Preparation Stage: Laying the Groundwork
Step 1: Create a Clean Environment. Perform laser lens cleaning indoors. Ensure the area is draft-free and dust-free. Clear your workspace thoroughly. Ideally, cover it with a clean, lint-free paper or a pristine white cloth. This protects the lens if it accidentally drops.
Step 2: Wear Finger Cots or Latex Gloves. Human skin oils are slightly acidic. They permanently corrode the anti-reflection (AR) coating on the lens surface. Therefore, never touch the optical surface of the lens with bare hands. Always wear powder-free latex gloves or specialized finger cots. This is crucial for proper laser lens cleaning.
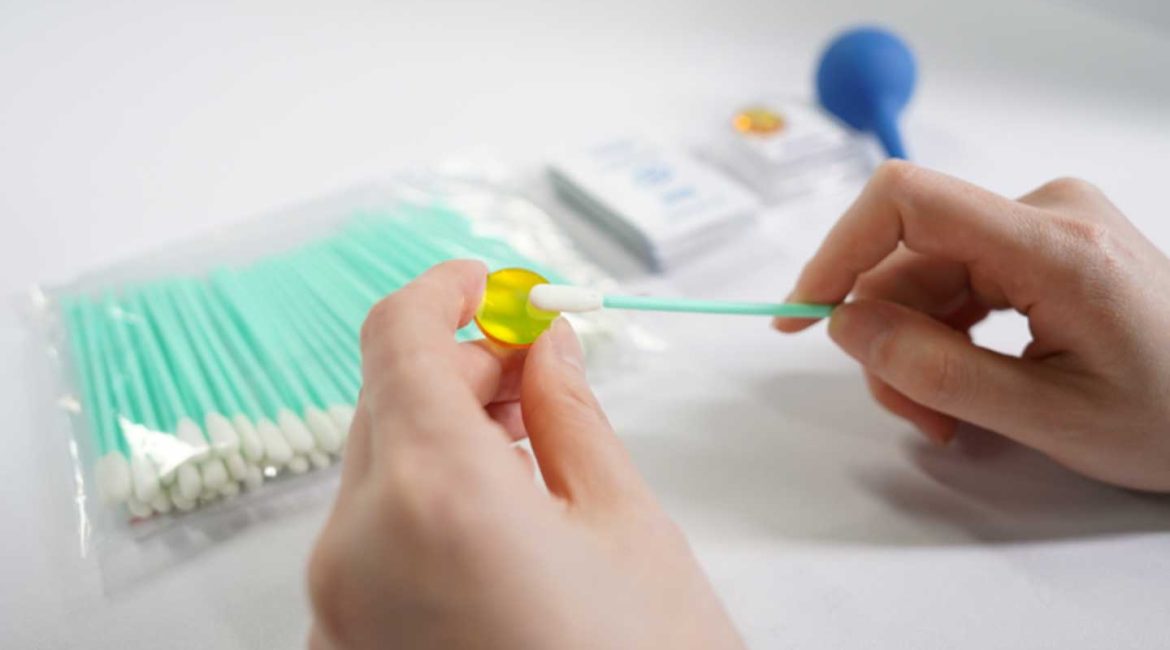
Step 3: Prepare Spectroscopic Grade Cleaning Solutions and Tools. Regular alcohol contains water and impurities. It leaves noticeable white water stains upon drying. Professional maintenance, specifically for effective laser lens cleaning, requires spectroscopic grade isopropyl alcohol (IPA) (99.9% purity or higher) or high-purity acetone. Moreover, gather an air blower (air bulb) and professional medical-grade long-fiber cotton swabs or optical lint-free wipes.
II. Inspection and Pre-treatment: First “Blow,” Then “Wipe”
Step 4: Conduct an Initial Lens Inspection. Hold the lens under a bright light. Observe its surface from the side. This crucial step helps identify the contaminant type. Is it loose dust? Are there oil splatters, fingerprints, or already formed burn spots? This guides your laser lens cleaning approach.
Step 5: Perform Non-Contact Dust Removal with Airflow. This is the most crucial first step in any laser lens cleaning process. Use an air blower. Gently direct air from the lens center outwards to the edges. Blow away all loose dust particles. Never use your mouth to blow. Saliva contains enzymes and moisture. These severely damage the lens coating. If airflow successfully removes the loose dust, minimize subsequent physical friction.
III. Precision Cleaning: A Gentle “Operation”
Step 6: Employ the “Dragging Wipe” Method (for minor dust or stains). Take a professional optical lint-free wipe. Fold it into a small pad. Add one drop of cleaning solution to make it slightly damp. Gently place the wipe on the lens surface. Use the wipe’s own weight and the cleaning solution’s surface tension. Slowly drag it in one direction. This method applies almost no downward pressure. Consequently, it is the best way to protect the coating during laser lens cleaning.
Step 7: Use the “Rotational Push” Method (for stubborn oil or fingerprints). If the lens has smoke residue or fingerprints, use a lint-free cotton swab. Dip it in a small amount of cleaning solution. Start from the lens center. Gently rotate and push it in a spiral path towards the edge. Important: Replace the cotton swab head after each rotation. This prevents secondary contamination during laser lens cleaning.
Step 8: Control the Pressure. ZnSe material is very soft. Your wiping pressure must be as light as “a feather brushing water.” Control the pressure during laser lens cleaning. Excessive force will not remove burn spots. Instead, it turns dust particles into “scrapers.” These damage the coating irreversibly.
IV. Post-treatment and Installation
Step 9: Perform Final Drying and Inspection. Wait a few seconds. Allow any residual cleaning solution to evaporate naturally. Then, re-examine the lens under bright light from multiple angles. Confirm no streaks, lint fibers, or watermarks remain. If you find any residue, repeat the previous laser lens cleaning steps.
Step 10: Correctly Reinstall and Focus. When placing the lens back into its mount, ensure the convex side faces up. This is the direction of laser entry. The locking ring only needs gentle tightening. Never overtighten it. The lens requires a tiny breathing space during thermal expansion and contraction. Overtightening causes stress concentration. This impacts the beam mode and ultimately the lens’s lifespan. Proper reinstallation ensures the effectiveness of your laser lens cleaning efforts.
Expert Reminder: When to Replace the Lens
If the lens surface already shows blackened burn spots, or if the coating has peeled off, or cracks have appeared, no laser lens cleaning method can restore it. Forcibly using a damaged lens in this condition may cause laser back-reflection. This could damage the cutting head or even the laser source itself. Therefore, the most professional action is to replace the lens promptly.